- Continue Shopping
- Your Cart is Empty
Free Standard Domestic Shipping over $30
how to polish sterling silver at home: easy tips and tricks
Polishing your sterling silver at home is surprisingly straightforward. You can easily whip up a gentle DIY paste using baking soda and water or opt for a specialized commercial silver polish. Both methods are great for safely lifting the dark tarnish that builds up over time, bringing back your jewelry's gorgeous shine without any harsh chemicals.
Understanding Why Your Silver Loses Its Shine

Have you ever pulled out your favorite sterling silver necklace only to find it looking a little dull or even dark? That discoloration is called tarnish. It's a completely natural process and definitely not a sign of poor quality—in fact, it's proof that you have genuine sterling silver!
The reason this happens is that sterling silver isn't pure silver. It's an alloy, which is a mix of metals. To be exact, true sterling silver contains 92.5% pure silver and 7.5% other metals, most often copper. Pure silver is just too soft for everyday jewelry, so the copper adds the strength and durability we need. Understanding this composition is key, and our guide on sterling silver vs gold-plated jewelry can give you more insight into why materials matter.
The Science Behind Tarnish
So, what's the catch with adding copper? Well, copper reacts with sulfur compounds floating around in the air, found in some foods, and even present in the natural oils on our skin. That chemical reaction forms a thin, dark layer of silver sulfide right on the surface. That’s the tarnish you see.
Tarnish is simply the result of a chemical reaction between the copper in your sterling silver and sulfur in the environment. It's a surface-level issue that, thankfully, can be easily reversed with the right techniques.
While you can't stop this process entirely, knowing how to polish sterling silver at home means you can manage it without a second thought. The need for simple, at-home care is so common that it has fueled all sorts of great products and DIY methods specifically designed to reverse that pesky copper oxidation.
Your At-Home Polishing Options
When your silver needs a little TLC, you have a couple of fantastic options right at your fingertips. The best choice really depends on how much tarnish you're dealing with and the design of the jewelry itself.
- DIY Pantry Solutions: You can achieve amazing results with common household items like baking soda and water. These methods are super cost-effective, gentle on your silver, and perfect for light to moderate tarnish, especially on simple pieces without delicate gemstones.
- Commercial Silver Polishes: If you're dealing with heavier tarnish or want to add a protective layer, specially formulated creams, liquids, or cloths are your best bet. They work fast and often include ingredients that help slow down future tarnish buildup, making them a great choice for intricate pieces.
To make it easier to decide, here’s a quick rundown of your options.
At-Home Polishing Methods At a Glance
| Method | Best For | Effort Level | Key Precaution |
|---|---|---|---|
| DIY Baking Soda Paste | Light to moderate tarnish on simple, sturdy silver pieces. | Low | Avoid using on pieces with soft gemstones or pearls, as the paste can be slightly abrasive. |
| Commercial Polishing Cream | Heavy tarnish or for providing a protective anti-tarnish coating. | Medium | Use in a well-ventilated area and wear gloves. Keep away from porous stones. |
| Polishing Cloth | Quick touch-ups and routine maintenance to prevent buildup. | Very Low | Best for smooth surfaces; may not reach into intricate crevices or chains. |
Ultimately, whether you reach for the baking soda or a dedicated polish, you have everything you need to keep your sterling silver looking its absolute best.
Assembling Your Silver Polishing Toolkit
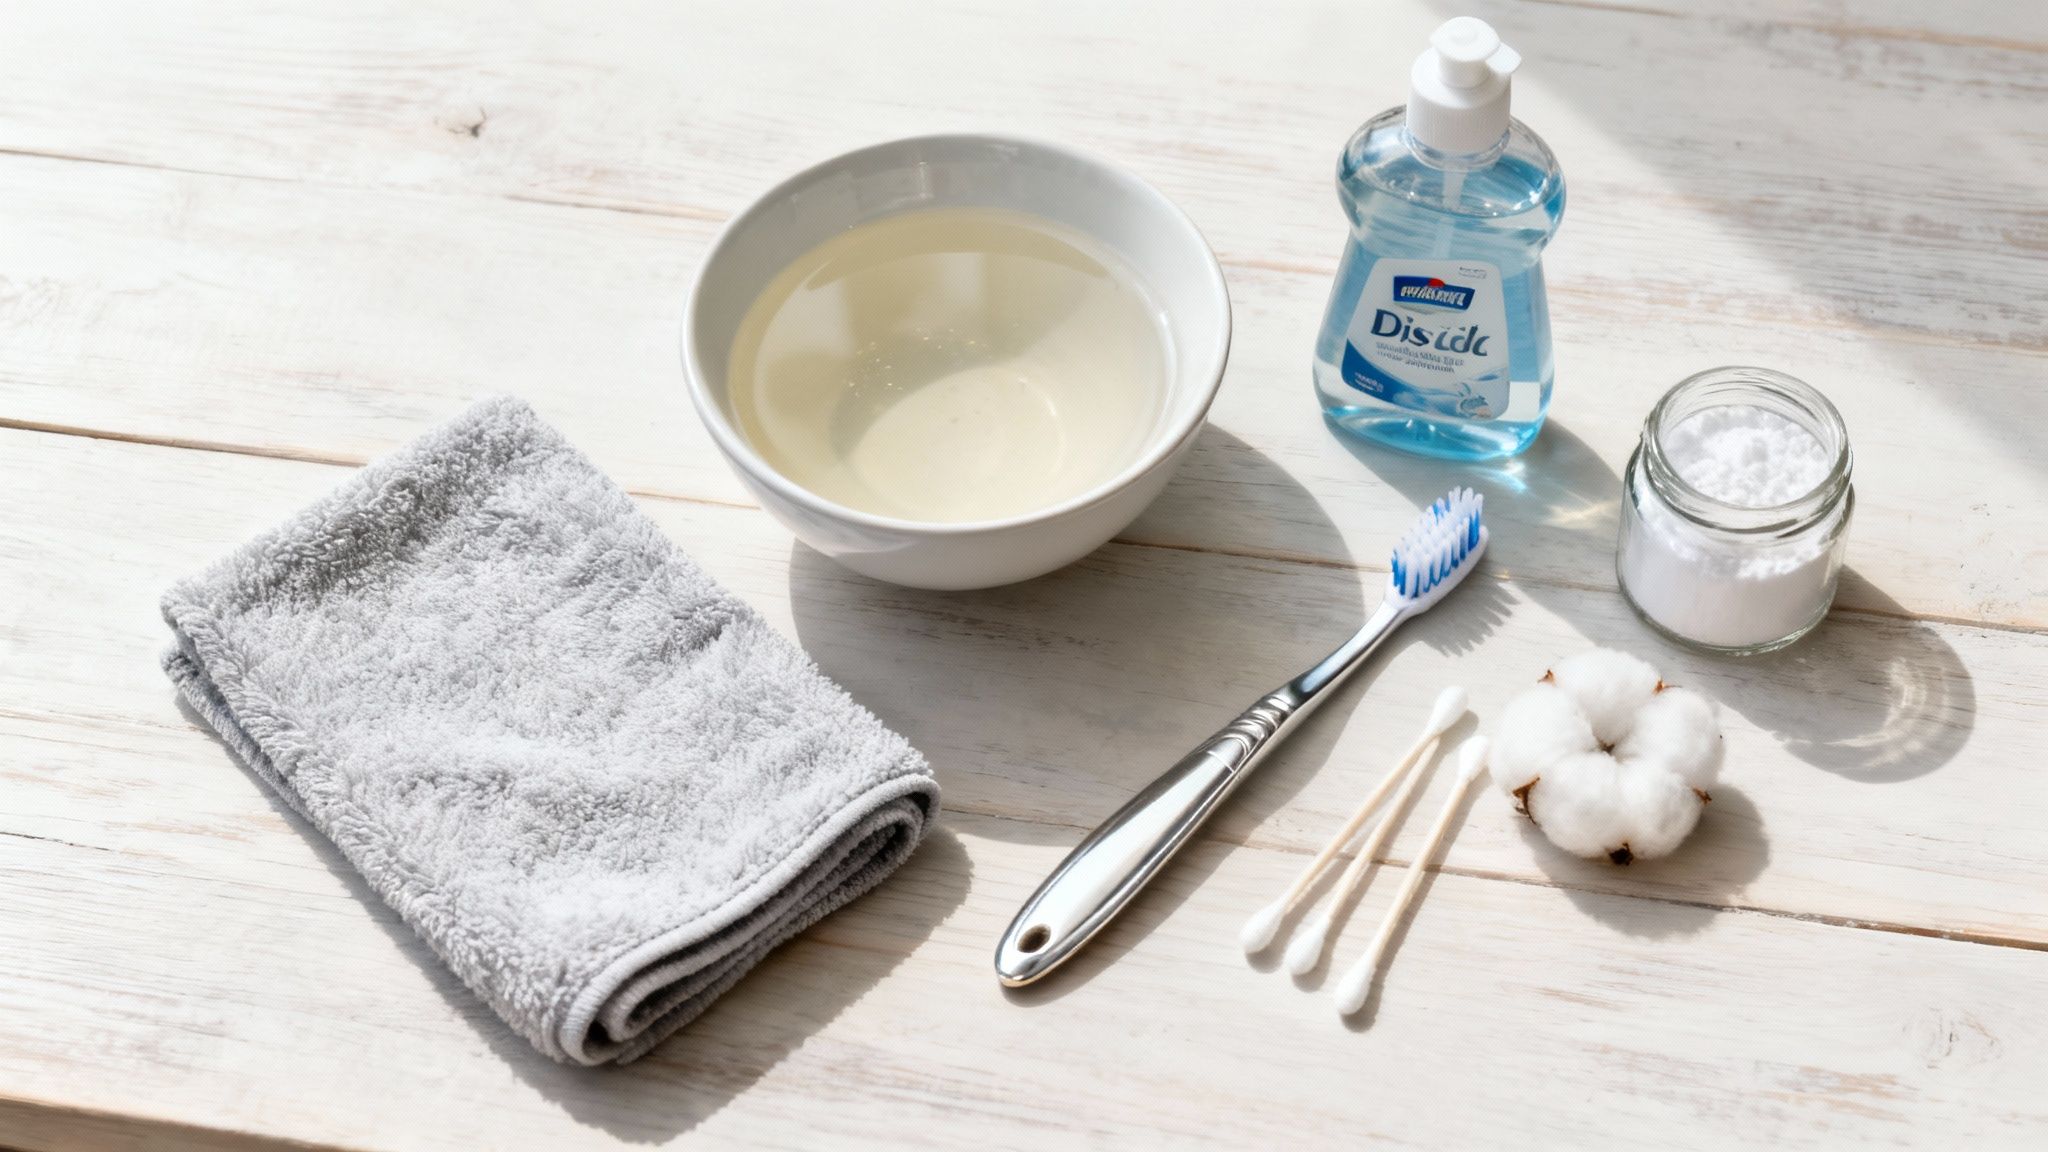
Before you even think about tackling tarnish, getting your supplies in order is the most important step. Having everything you need on hand turns what could be a frustrating task into a satisfying little ritual. A bit of prep work now will save you from accidentally scratching or damaging the beautiful details on your EFYTAL pieces later.
The good news? You probably have most of these items around the house already. This isn't about buying expensive, professional-grade equipment; it's about using the right gentle tools for the job.
Your Core Polishing Supplies
Think of this as your essential checklist. Each item has a very specific job to do, all centered around gently removing tarnish without harming the silver underneath.
-
Two Ultra-Soft Microfiber Cloths: These are your best friends for this job. You’ll need one for cleaning and a second, completely dry one for buffing to a brilliant shine. Microfiber is key because it’s incredibly soft and won’t leave the tiny, dulling scratches that paper towels or even cotton can.
-
Mild, Phosphate-Free Dish Soap: Always start with a quick bath for your jewelry. A simple pre-wash in warm, soapy water lifts away any surface-level grime, lotion, or dust. This lets your polish get straight to work on the actual tarnish.
-
A Soft-Bristled Toothbrush: This is your secret weapon for all the little nooks and crannies. Think of the intricate links in a chain or the delicate edges of an engraved charm—a toothbrush can get in there where a cloth can't. A baby toothbrush is ideal here; the bristles are exceptionally soft.
Pro Tip: Whatever you do, don't grab an old toothbrush from your bathroom. Leftover toothpaste residue is abrasive and can easily scratch sterling silver, leaving a permanent dullness. Always set aside a brand new, soft brush just for your jewelry.
That's it. With these three simple things, you’re ready to bring back that beautiful luster using either a DIY solution or a commercial polish. This basic kit is really the secret to getting a professional-looking shine at home and keeping your favorite pieces looking their best.
Safe and Effective DIY Polishing Methods

You don't need a drawer full of harsh chemicals to get your silver sparkling again. In fact, some of the best and safest remedies are probably already in your pantry. These simple DIY solutions use common household ingredients to gently reverse the chemical reaction that causes tarnish, lifting away the discoloration without harming the precious metal.
Let's walk through two of my favorite homemade methods. One is a simple paste that uses a bit of gentle abrasion to buff away light tarnish, and the other is a fascinating chemical bath that pretty much does all the work for you. Both work wonders, but it's important to know which one is the right fit for your specific piece.
The Gentle Baking Soda Paste Method
When you're dealing with light to moderate tarnish on a sturdy piece of silver, a simple baking soda paste is a fantastic go-to. This technique is all about gentle, controlled cleaning.
The real trick is getting the consistency just right—you’re aiming for something smooth like toothpaste, not gritty like wet sand. A paste that’s too coarse can actually create tiny micro-scratches on your silver’s surface.
Making the Paste:
- In a small bowl, mix two parts baking soda with one part lukewarm water.
- Stir them together until you have a smooth, uniform paste. If it feels too runny, just sprinkle in a little more baking soda. Too thick? Add a drop or two of water.
Once your paste is ready, dab a small amount onto your microfiber cloth or the tip of a soft-bristled toothbrush. Gently rub it onto the silver using straight, back-and-forth motions—try to avoid rubbing in circles, as this can make any fine scratches more noticeable. After a minute or two, rinse the piece thoroughly under cool running water and buff it completely dry with a clean cloth.
The Aluminum Foil and Baking Soda Bath
For jewelry with more stubborn tarnish or intricate nooks and crannies that are tough to reach, this method is pure magic. It uses a simple electrochemical reaction to transfer the sulfur (the tarnish) right off your silver and onto the aluminum foil. It’s a neat bit of science, and it’s surprisingly easy!
This is my favorite method because it’s completely non-abrasive. It cleans by literally reversing the tarnishing process, making it a safe bet for most sterling silver. You'll still want to be careful with exceptionally delicate pieces, though.
Here’s how to set up your silver-cleaning bath:
- Line a heat-proof bowl or glass dish with a sheet of aluminum foil, shiny side facing up.
- Lay your sterling silver jewelry right on top of the foil, making sure each piece is touching it.
- Sprinkle about one tablespoon of baking soda over the jewelry.
- Carefully pour in enough hot (not boiling!) water to completely submerge everything.
You should see some gentle bubbling as the reaction starts. Let the jewelry soak for about five to ten minutes. Then, carefully fish it out with tongs, give it a good rinse under cool water, and buff it dry.
For a deeper dive into restoring your favorite pieces, our complete how to clean tarnished jewelry guide has even more tips and tricks.
Important Warnings for DIY Methods
While these DIY approaches are generally safe, they aren't a one-size-fits-all solution. There are some pieces you should never use these methods on.
Steer clear of these techniques if your jewelry features:
- Soft or Porous Gemstones: Stones like pearls, opals, turquoise, and coral are delicate. They can be easily damaged by the mild abrasiveness of baking soda or the heat from the water bath.
- Antiqued or Oxidized Finishes: Many EFYTAL designs have intentionally darkened areas to make the details pop. These DIY methods are too effective—they’ll strip that beautiful patina right off, ruining the artist’s intended design.
For more information, this guide on how to clean silver is a great resource for comparing different at-home techniques. When in doubt, always inspect your piece carefully and just stick to a simple polishing cloth.
Using Commercial Silver Polishes the Right Way
While DIY methods are fantastic for a quick touch-up, there are times when you need something with a little more muscle. For those moments, a good commercial silver polish is your best friend. These products are specifically formulated to tackle stubborn tarnish and often leave behind a protective layer that helps keep your jewelry shining longer.
This is especially true for pieces that have developed heavy tarnish over time or have intricate details where a simple paste just can't reach. Honestly, sometimes you just need the reliable, consistent results a professional-grade product can deliver.
Choosing the Right Commercial Polish
Walking down the cleaning aisle can be a bit much, but picking the right polish is easy once you know what to look for. The single most important thing is to choose a non-abrasive formula. Think of abrasive polishes like a very fine liquid sandpaper—they'll get the tarnish off, but they also scrub away a tiny layer of silver each time. Over the years, that can wear down delicate engravings.
I always tell people to look for products labeled as "gentle" or made specifically for fine jewelry. They usually come in a few different forms, each with its own perks:
- Creams and Pastes: These are my go-to for heavy-duty cleaning. They give you fantastic control, allowing you to work a thick, even coat over the piece, which is perfect for carefully cleaning around gemstones.
- Liquids and Foams: Super easy to apply and rinse off. Foams are particularly great for getting into all the tiny nooks and crannies of a detailed chain or a piece with delicate filigree work.
- Pre-Treated Polishing Cloths: You can't beat these for routine maintenance and quick touch-ups. They typically have two sides: one for cleaning away light tarnish and the other for buffing to a brilliant shine.
It's clear that more and more people are investing in quality care for their jewelry. The global market for gold and silver cleaners was valued at around USD 2.5 billion in 2023, and it's only growing. This push for better at-home solutions means we're seeing more effective and safer formulas become available. If you're curious, you can learn more about the gold and silver cleaner market trends and see how things are evolving.
Best Practices for Application
Once you've picked your polish, how you apply it matters just as much as the product itself. If you rush the job or cut corners, you can end up with a streaky finish or even damage your jewelry.
Safety First: Always work in a well-ventilated area, maybe near an open window, and I highly recommend wearing gloves. The fumes from some polishes can be strong, and the chemicals aren't great for sensitive skin.
To get that flawless, professional-looking shine every single time, just follow these simple guidelines. They really make a difference.
Start with a Clean Slate
Just like with the homemade methods, give your jewelry a quick wash in warm, soapy water and dry it completely. This gets rid of any surface oils or lotions that could get in the way.
Apply Sparingly
You really don't need much. A little dab of polish—about the size of a pea—on a soft microfiber cloth is plenty. Never squeeze it directly onto the silver.
Use a Gentle Touch
Rub the polish onto the silver using straight, back-and-forth motions. It's tempting to scrub in circles, but that can create fine swirl marks on the surface. Be patient and let the polish do the heavy lifting.
Rinse and Buff
After you’ve worked the polish over the entire piece, rinse it thoroughly under cool running water until every last bit of residue is gone. Then, grab a separate, clean microfiber cloth and buff it to a brilliant shine. This final step is what brings out that gorgeous luster.
Protecting Gemstones and Mixed Metals
Not all sterling silver jewelry is made the same. When a piece features beautiful gemstones or accents of other metals, you can’t just use a one-size-fits-all polishing method. Applying the wrong technique can lead to some heartbreaking mistakes, like dulling a vibrant stone or accidentally stripping a delicate gold finish.
Think of this as a "do no harm" approach. The entire goal is to protect the non-silver elements from the very things meant to make the silver shine. Some of the most popular DIY methods, especially the baking soda bath, are just too aggressive for certain materials.
Handling Delicate Gemstones
Many of the gemstones we adore are surprisingly delicate. They can be porous, soft, or both, which means they can easily absorb chemicals or get scratched by abrasive pastes. This is particularly true for organic gems or any stone with a high water content.
A few common examples to be extra careful with include:
- Pearls: These are easily damaged by the mild acids in some cleaners and the gritty texture of polishing pastes.
- Opals: Since opals contain water, sudden temperature changes or harsh chemicals can cause them to crack or lose that beautiful fire.
- Turquoise: This is an extremely porous stone that will literally drink up any chemicals it touches, which can lead to permanent discoloration.
For jewelry with these sensitive stones, you absolutely must avoid soaking the entire piece. The best method is precision cleaning, plain and simple.
Your secret weapon here is a humble cotton swab. Just dip it lightly into your commercial polish or baking soda paste and carefully work on the silver around the stone. Pay close attention to the setting, making sure you don't touch the gem itself. It gives you total control.
This decision tree infographic is a great visual for figuring out which polishing method is right for your specific piece.
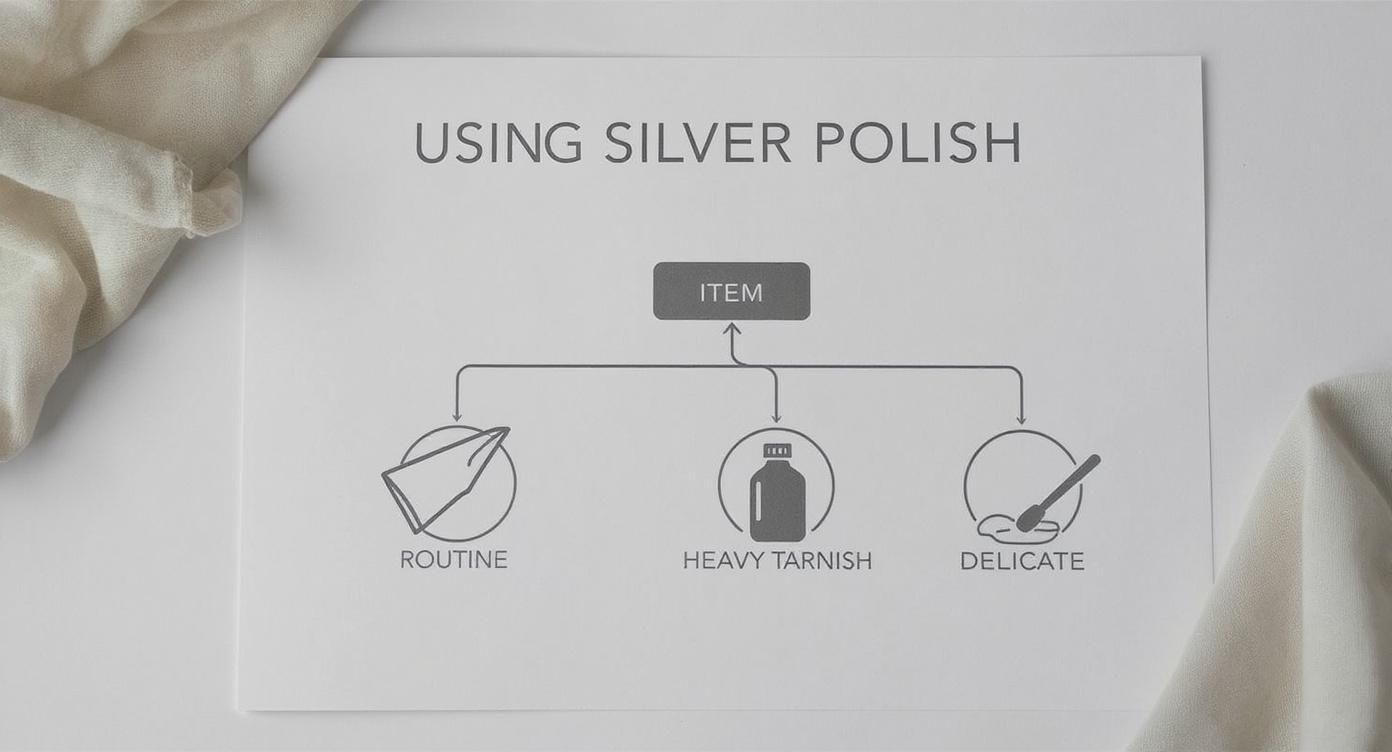
The main takeaway is clear: delicate jewelry with gemstones or mixed metals always requires a more targeted, careful approach. Stick with a cotton swab instead of a full polish or soak.
To make things a bit easier, here’s a quick reference table for some common gemstones you might find in your jewelry box.
Gemstone Safety During Polishing
| Gemstone Type | Safe with Water | Safe with DIY Solutions (Baking Soda) | Safe with Commercial Polish | Best Practice |
|---|---|---|---|---|
| Diamond | Yes | Yes | Yes | Very durable; safe for most cleaning methods. |
| Sapphire | Yes | Yes | Yes | Hard and non-porous; generally safe. |
| Ruby | Yes | Yes | Yes | Like sapphires, these are very tough. |
| Emerald | Yes (briefly) | No | No | Often treated with oils; avoid chemicals and ultrasonic cleaners. |
| Amethyst | Yes | Yes | Yes | Generally safe, but avoid harsh temperature changes. |
| Pearl | Yes (damp cloth) | No | No | Organic and soft; clean only with a soft, damp cloth. |
| Opal | Yes (briefly) | No | No | Avoid chemicals and sudden temperature shifts to prevent cracking. |
| Turquoise | No | No | No | Highly porous; use a dry polishing cloth on surrounding metal only. |
Always err on the side of caution. If you're ever unsure about a specific stone, it’s best to use the most gentle method possible—a simple polishing cloth or a targeted cotton swab application—to avoid any potential damage.
Navigating Mixed Metal and Gold-Filled Jewelry
Many of our EFYTAL designs beautifully combine sterling silver with other metals, like our much-loved 14k gold-filled accents. While gold-fill is an incredibly durable and high-quality material, it simply doesn’t tarnish like silver. Using a silver polish on it is not only unnecessary but could wear down that lovely gold layer over many years.
The strategy here is exactly the same as with gemstones: isolate and treat. Grab a polishing cloth or a cotton swab and focus your efforts only on the sterling silver parts of the jewelry. Take your time and be deliberate to avoid rubbing the gold-filled areas.
This approach ensures the silver gets back its bright shine while the gold keeps its warm, lustrous finish. For more in-depth advice, we have a complete guide on how to care for gold-filled jewelry that’s full of tips. By treating each metal for what it is, you’ll maintain the beautiful contrast and integrity of the original design for years to come.
Proactive Care to Keep Silver Brighter Longer
While it's great to know how to bring your sterling silver back to life, the real secret to a lasting shine is prevention. Think of it this way: polishing is the cure, but proactive care is the vaccine. A few simple habits can dramatically slow down tarnish, meaning your favorite EFYTAL pieces are always ready to go when you are.
The whole game is about limiting your silver's exposure to the two things it hates most: sulfur and moisture. Gentle, consistent care will always beat infrequent, aggressive cleaning sessions.
Smart Storage Solutions
Honestly, how you store your jewelry when you're not wearing it makes the biggest difference. Leaving a beautiful silver necklace out on a dresser is basically inviting tarnish to set in.
If you take away just one tip, let it be this: limit your silver's contact with air and humidity when you're not wearing it. An airtight environment is your jewelry’s best friend.
Getting into these habits will change everything:
- Anti-Tarnish Bags or Cloths are a Lifesaver: Tucking each piece into a specially treated bag or wrapping it in an anti-tarnish cloth is a fantastic way to absorb the airborne sulfur compounds that cause discoloration.
- Airtight is Always Right: You don't need anything fancy. A simple zip-top plastic bag with the air pressed out works beautifully. If you want something a bit nicer, a felt-lined jewelry box with a lid that closes securely is a great choice.
- Toss in an Anti-Tarnish Strip: Pop one of these little paper squares into your jewelry box. They act like a magnet for pollutants in the air, pulling them away from your silver.
Daily Habits That Make a Difference
What your silver touches while you're wearing it matters just as much as how you store it. Some of the most common things we use every day can speed up tarnishing like crazy.
Keep an eye out for these culprits:
- Jewelry Off Before You Get Wet: Always take your silver off before hopping in the shower or going for a swim. It's not just the water—it's the chlorine in pools and the chemicals in your soaps and shampoos that can be really harsh.
- The "Last On, First Off" Rule: Make putting on your jewelry the very last step of your getting-ready routine. Apply your lotions, perfumes, and hairspray first, and give them a moment to dry completely before you accessorize.
- A Quick Wipe-Down Goes a Long Way: Before you put your piece away for the night, give it a quick, gentle wipe with a soft, dry cloth. This takes just a few seconds and removes the oils and sweat from your skin that can kickstart the tarnishing process.
Your Top Silver Polishing Questions, Answered
Even after you've polished a few pieces, some questions inevitably come up. We get it. Here are the answers to some of the most common things people ask when learning how to care for their sterling silver at home.
How Often Should I Be Polishing My Jewelry?
Honestly, there’s no single right answer. It really depends on your climate (humidity is a big factor!), how often you wear a particular piece, and even your own body chemistry.
For pieces you wear all the time, a quick wipe-down with a treated polishing cloth every couple of weeks should do the trick. For a more thorough cleaning, aim for every few months or simply whenever you start to see that tell-tale tarnish creeping in.
Just a word of caution: it is possible to over-polish. Doing it too often can gradually wear down the fine details of your jewelry, so it's best to save the deep cleans for when they're truly needed.
I’ve Heard You Can Use Toothpaste to Polish Silver. Is That True?
This is a classic DIY myth we need to bust right now—please, step away from the toothpaste! Most formulas contain tiny, gritty abrasives like silica designed to scrub your teeth. On soft sterling silver, those same particles will create a web of micro-scratches, leaving your jewelry with a permanently dull and hazy finish over time.
Stick with a gentle, non-abrasive method, like the baking soda paste we talked about, or a professionally formulated silver polish.
Is It Safe to Polish My Antique Silver Jewelry at Home?
When it comes to vintage pieces, our best advice is to proceed with extreme caution. Many antique items have a beautiful, dark layer in the recessed areas called a patina. This isn't just tarnish; it's an intentional part of the piece's history that adds depth, character, and often, significant value.
Scrubbing an antique piece at home can easily strip away this desirable patina, which can actually lower its value. If you have a precious family heirloom or a valuable antique, we always recommend consulting a professional jeweler before you try to clean it yourself.
At EFYTAL, we design our jewelry to be cherished for a lifetime, and proper care is a huge part of that. To find your next forever piece, feel free to explore our handcrafted sterling silver collections at https://www.efytal.com.
Leave a comment
© 2025 EFYTAL Jewelry. Site By Shopify Expert


